
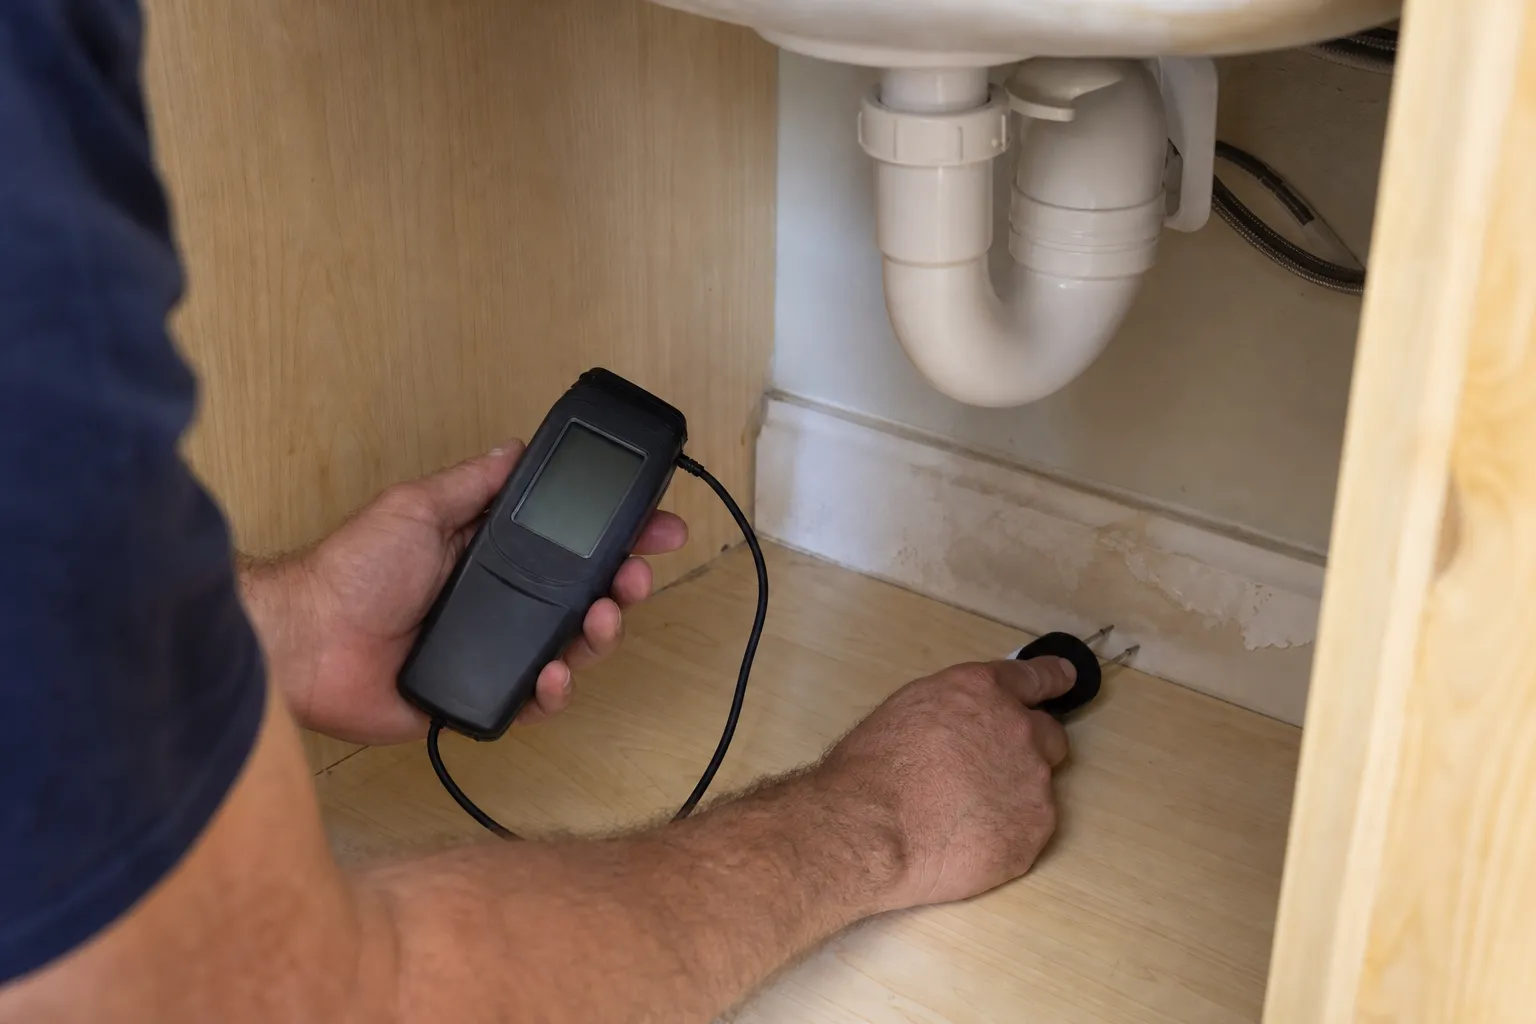
Understanding how professional leak detection works starts with an important point: there is no single device that reveals every pipe behind every surface. Finding a hidden leak is a process of ruling out normal water use, isolating parts of the plumbing, and comparing several kinds of evidence until the likely source becomes a specific repair area.
That sequence matters because water travels. A ceiling stain may form several feet from a leaking connection, moisture can follow framing, and water escaping under a slab may surface at an expansion joint or floor edge. Accurate leak detection traces the problem back to its source instead of treating the first wet spot as the answer.
The technician also has to distinguish a leaking supply pipe from a drain leak, failed fixture seal, appliance connection, irrigation problem, condensation, or exterior water intrusion. Each behaves differently and calls for different testing. A whole-property plumbing inspection provides context when the symptom does not point neatly to one system.
In this article, you will learn about:
- How a plumber confirms that unexplained water use is really a leak
- Why isolation and pressure testing come before pinpoint equipment
- What acoustic, thermal, moisture, and camera tools can and cannot show
- How leak location findings become a targeted repair plan
The goal is not to use every tool on every call. It is to select the next test that can eliminate the most possibilities without opening unnecessary walls, ceilings, floors, or concrete.
Keep reading to see how hidden leak detection moves from a vague symptom to a defensible location.
The investigation starts before any wall gets opened
A good diagnostic visit begins with the story of the leak. When did the water bill change? Is the symptom constant or intermittent? Does it appear only after a shower, toilet flush, irrigation cycle, or appliance use? The timing often separates a pressurized supply leak from a drain or fixture problem before specialized equipment comes out.
The technician then establishes a baseline with fixtures off and checks whether water is still moving through the meter. Homeowners may have already noticed one of the common signs of a hidden water-line leak, but the test sequence has to confirm which system is responsible.
An initial investigation usually includes these steps:
- 1Review water bills, meter alerts, recent repairs, and the age of the plumbing.
- 2Confirm that toilets, faucets, irrigation, appliances, and water treatment equipment are not operating.
- 3Observe the meter or flow monitor during a controlled no-use period.
- 4Check visible valves, connectors, fixtures, and water-heating equipment.
- 5Isolate branches or systems and watch for changes in flow or pressure.
- 6Select pinpoint testing based on the remaining likely locations.
This order prevents a common mistake: assuming that a high meter reading proves a pipe is leaking under the slab. A fixture can waste a surprising amount of water without leaving a puddle where you will see it.
The 2026 EPA WaterSense leak-detection guide gives a striking example: a stuck toilet fill valve can waste 4,300 gallons per day and create water costs of up to $1,400 in a month. That is why fixture checks and isolation are part of professional diagnosis, even when the homeowner suspects a hidden pipe.
Symptoms help identify which system to test first
Continuous meter movement points toward the pressurized water system, but a stain that grows only when a particular fixture drains suggests a different path. A warm floor area can raise suspicion around a buried hot-water line, while intermittent ceiling moisture may follow shower use or an upstairs overflow connection.
Equipment history matters too. A corroded tank, relief-valve discharge, or loose connector can mimic a hidden line leak near the garage or utility area. Checking the water heater and its connections keeps the investigation focused on accessible causes before testing concealed piping.
The meter confirms loss, but not the location
The water meter is one of the most useful starting tools because it answers whether water is passing into the property during a controlled no-use period. The City of San Luis Obispo's meter instructions state that newer digital meters can register use down to 0.01 gallons; for an analog meter without a leak indicator, the city recommends marking the hand and checking it again after about 20 minutes without using water.
Meter movement confirms flow, not its destination. The EPA's current WaterSense statistics estimate that an average family can lose 180 gallons per week, or 9,400 gallons per year, to household leaks. The technician still has to determine whether that loss comes from a fixture, appliance, irrigation branch, service line, or concealed interior pipe.
Isolation turns a whole house into smaller test zones
Branch shutoffs and individual fixture valves can divide the system into manageable areas. If meter movement stops when irrigation is isolated, the interior plumbing becomes less likely. If closing the water-heater supply changes the result, attention shifts toward hot-water piping and connected equipment.
Accessible fixtures are tested rather than assumed. A worn cartridge may need faucet repair. Silent tank leakage can make toilet diagnosis the real solution. The familiar symptom of a running toilet increasing water use can also be intermittent, so a quiet bathroom during the appointment does not automatically clear it.
Diagnostic tools narrow the search in different ways
Once basic causes are eliminated, the plumber chooses tools based on the suspected pipe, material, location, and leak behavior. Pressure tests answer whether an isolated section holds. Listening equipment tracks leak noise. Thermal imaging maps surface temperature differences, while moisture meters confirm where materials are wet.
None of these readings should stand alone. A cool patch on a wall may reflect insulation or airflow rather than water, and a loud sound may travel along metal pipe away from the opening. The strength of professional diagnosis is the agreement between tests, building layout, and the leak's observed behavior.
Common diagnostic methods include:
- Meter and flow testing to confirm continuous or abnormal water use
- Static and dynamic pressure checks to identify loss or unstable supply conditions
- Sectional isolation to compare branches, hot and cold lines, and exterior systems
- Electronic listening and ground microphones to identify leak-generated sound
- Infrared imaging to map useful surface-temperature patterns
- Pin and pinless moisture meters to compare damp and dry materials
- Inspection cameras to look inside accessible cavities or drainage piping
- Tracer gas or other specialized methods when sound and moisture evidence are limited
The exact combination changes with the job. A copper line under a slab, a plastic service line in soil, and a shower leak behind tile transmit different evidence.
Testing conditions matter as well. Background noise, pipe depth, water pressure, flooring type, soil, and nearby mechanical equipment can all affect what an instrument detects.
Pressure testing shows whether an isolated section holds
A technician may close fixtures, isolate a branch, and monitor a gauge for a pressure drop. The result can confirm loss within that test section, but the setup must account for thermal expansion, valve leakage, regulator behavior, and connected equipment. An unexplained drop is evidence to investigate, not a map pin by itself.
Baseline water-pressure and regulator service is especially relevant when the property has pressure swings or repeated connector failures. A homeowner can perform a basic water-pressure check, but isolating zones and interpreting a decay test requires control over the system. Understanding what a pressure regulator does also prevents a failing regulator from being mistaken for proof of one specific hidden leak.
Acoustic equipment listens for escaping water
Pressurized water escaping a pipe creates vibration that can travel through the pipe, surrounding material, or soil. Electronic listening devices amplify and filter that sound. A technician compares readings at valves, exposed pipe, floors, or ground locations, then narrows the search toward the strongest consistent signal.
The U.S. Department of Energy's leak-detection technology overview explains that listening sticks indicate a leak nearby but require another step, such as correlation, to pinpoint it. Inside a home, the same caution applies: acoustic evidence is strongest when it agrees with pressure testing, known pipe routing, and repeatable sound. If the source is an underground supply, the repair may fall under water-line service rather than an interior wall opening.
Thermal and moisture tools map effects, not pipe interiors
Infrared cameras display surface temperature differences. Escaping hot water may create a warm path, while evaporation or cold water can create a cooler area under suitable conditions. A U.S. Department of Energy diagnostic protocol cautions that an infrared camera is not itself a moisture detector; damp areas may appear different because of evaporative cooling, and interpretation depends on temperature conditions and training.
Moisture readings help test whether the thermal pattern corresponds to damp material. Small visual scopes can inspect an accessible cavity through a limited opening, while a sewer camera inspection is designed for the inside of drain and sewer piping. Knowing what a sewer camera can reveal prevents it from being confused with equipment used to locate a pressurized water leak outside the pipe.
The suspected location changes the detection strategy
The building tells the technician where evidence can travel. Concrete carries sound differently from wood framing. Insulation can hold moisture away from the failed fitting. Soil can absorb water for a long time before a wet area reaches the surface.
For that reason, the process begins with the plumbing layout whenever drawings or visible clues are available. Fixture positions, manifold locations, water-heater placement, pipe-entry points, and past remodels help reconstruct a likely route before the technician marks a repair area.
Different leak locations call for different combinations of evidence:
- Slab leaks often rely on hot-versus-cold isolation, pressure loss, acoustic mapping, and floor-temperature patterns.
- Wall leaks may combine fixture testing, moisture comparisons, thermal imaging, and limited cavity inspection.
- Ceiling leaks require checking supply piping, fixture drains, overflow fittings, shower assemblies, and condensation sources above.
- Underground service-line leaks use meter behavior, isolation, route tracing, listening, and surface observations.
- Drain leaks are tested during discharge because they may remain dry when fixtures are not in use.
- Intermittent leaks may need repeated testing under the exact operating condition that produces the symptom.
A result that does not match the pipe route should prompt another test. Cutting at the wettest or loudest point without reconciling the layout can miss the actual failure.
The final target is usually an area, not a promise that the defect sits at an exact fraction of an inch. Honest findings account for the limits created by materials, access, and site conditions.
Slab leaks need multiple confirming signals
For a suspected slab leak, the technician first determines whether the hot or cold system is losing pressure. The known pipe route, acoustic peaks, surface temperatures, meter flow, and changes after isolation are compared. A warm floor alone is not conclusive because sunlight, heating ducts, appliances, and floor construction can also create temperature differences.
Once the area is narrowed, the repair decision may involve direct access, abandoning and rerouting one line, or broader pipe repair and replacement. Material and routing options often bring up the practical differences between PEX and copper, especially when the preferred fix avoids putting a vulnerable line back under the slab.
Wall and ceiling leaks can come from supply or drainage
A pressurized supply leak may run continuously, while a shower drain, tub overflow, or fixture seal may leak only during use. Controlled fixture testing helps reproduce the symptom. The technician may run the shower without wetting the walls, then test the enclosure separately, or fill a basin and release it while watching the affected area.
This stepwise approach can separate hidden pipe failure from a problem tied to shower plumbing. A vanity's sink connections can be tested under controlled use. The same applies to the drain and overflow parts involved in bathtub installation. The visible damage can look similar even though each repair is different.
Yard and service-line leaks may never produce an indoor stain
An underground service line can leak into soil without affecting an interior wall or floor. Clues may include meter flow with the home isolated, a soft patch of soil, unusual plant growth, a pressure change, or water surfacing near the route. Soil type, pipe material, depth, and pressure all influence how quickly the leak becomes visible.
After locating the affected section, the condition of the rest of the line determines whether a spot repair is reasonable. The choice between water-main repair and replacement depends on failure type, pipe age, material, access, and whether similar weak points remain. Some projects allow less disruptive water-line routing. Site access and surface restoration are among the factors that shape a water-line replacement scope.
A clear finding leads to a targeted repair plan
Leak detection should end with an explanation, not just a mark on the floor. The homeowner needs to know what was tested, what changed during isolation, which readings agreed, where the source is most likely located, and what uncertainty remains.
The repair recommendation then follows the failure, not the instrument used to find it. A loose fixture connection, pinhole in one accessible section, failed underground line, or system-wide corrosion each calls for a different scope.
A useful diagnostic summary should cover:
- The symptoms and usage information reviewed
- The fixtures and branches ruled out
- The pressure, flow, sound, temperature, or moisture evidence collected
- The most likely leak location and the basis for that conclusion
- Access options and the expected effect on finishes
- Spot repair, reroute, or replacement alternatives when more than one is reasonable
- Post-repair testing needed to confirm the leak has stopped
Documentation is especially useful when flooring, cabinets, or concrete must be removed by another contractor. It gives the repair team a defined target and helps everyone coordinate access and restoration.
It also creates a baseline. If the meter continues moving or pressure still falls after the repair, the system can be retested against the original findings rather than starting from memory.
The wettest spot is not always the source
Water can follow a pipe, framing member, vapor barrier, or crack before appearing. Moisture mapping shows the extent of affected material, while isolation and pressure behavior tie that pattern back to the plumbing. The source is the failure point; the stain is one consequence.
Drainage problems need their own confirmation. A backed-up line can force water out at a weak seal even when the pipe itself is not broken, so flow testing and, when appropriate, drain cleaning may be part of resolving the symptom. That is different from repairing a leaking pressurized line.
Repair may mean access, rerouting, or repiping
A single isolated defect in otherwise sound pipe may justify a focused repair. A failed line beneath a slab may be safer to reroute through accessible framing. Repeated pinholes, widespread corrosion, or multiple weak sections can shift the conversation toward replacement rather than opening the home for one repair after another.
The signs that a home needs repiping include more than the current wet area. Original material, recurring leaks, restricted flow, and corrosion elsewhere all matter. Older Central Coast homes with aging steel may face the specific risks that drive galvanized-pipe replacement. The expected whole-home repipe timeline also helps compare a coordinated project with repeated disruption.
Verification proves the repair solved the diagnosed loss
After the repair, the same baseline tests should be repeated. Confirm that the meter stops during the no-use period, the isolated section holds pressure, the fixture or appliance operates normally, and no new moisture appears under realistic use.
Preventive work should address contributing conditions without pretending every leak can be predicted. Excess pressure, hard-water scale, aging connectors, and corrosion deserve attention when the evidence supports them. A water-treatment assessment can clarify quality concerns. Recognizing high-pressure damage to plumbing can also help reduce stress on repaired and existing components.
Conclusion
Professional leak detection is a structured elimination process. Meter behavior confirms unexplained flow, isolation narrows the system, and pressure, acoustic, thermal, moisture, or camera evidence helps define the likely source.
The best result is not the most equipment used. It is a well-supported location and repair plan that limits unnecessary demolition while addressing the actual cause of the water loss.
If you hear water running, see moisture where it should not be, or notice unexplained usage, Drain Doctors Plumbing can trace the problem and explain the next step. Contact Drain Doctors Plumbing to schedule leak detection in San Luis Obispo County.
Tell us what's going on and our licensed team will point you in the right direction. Call (805) 467-1214 or request service online.