
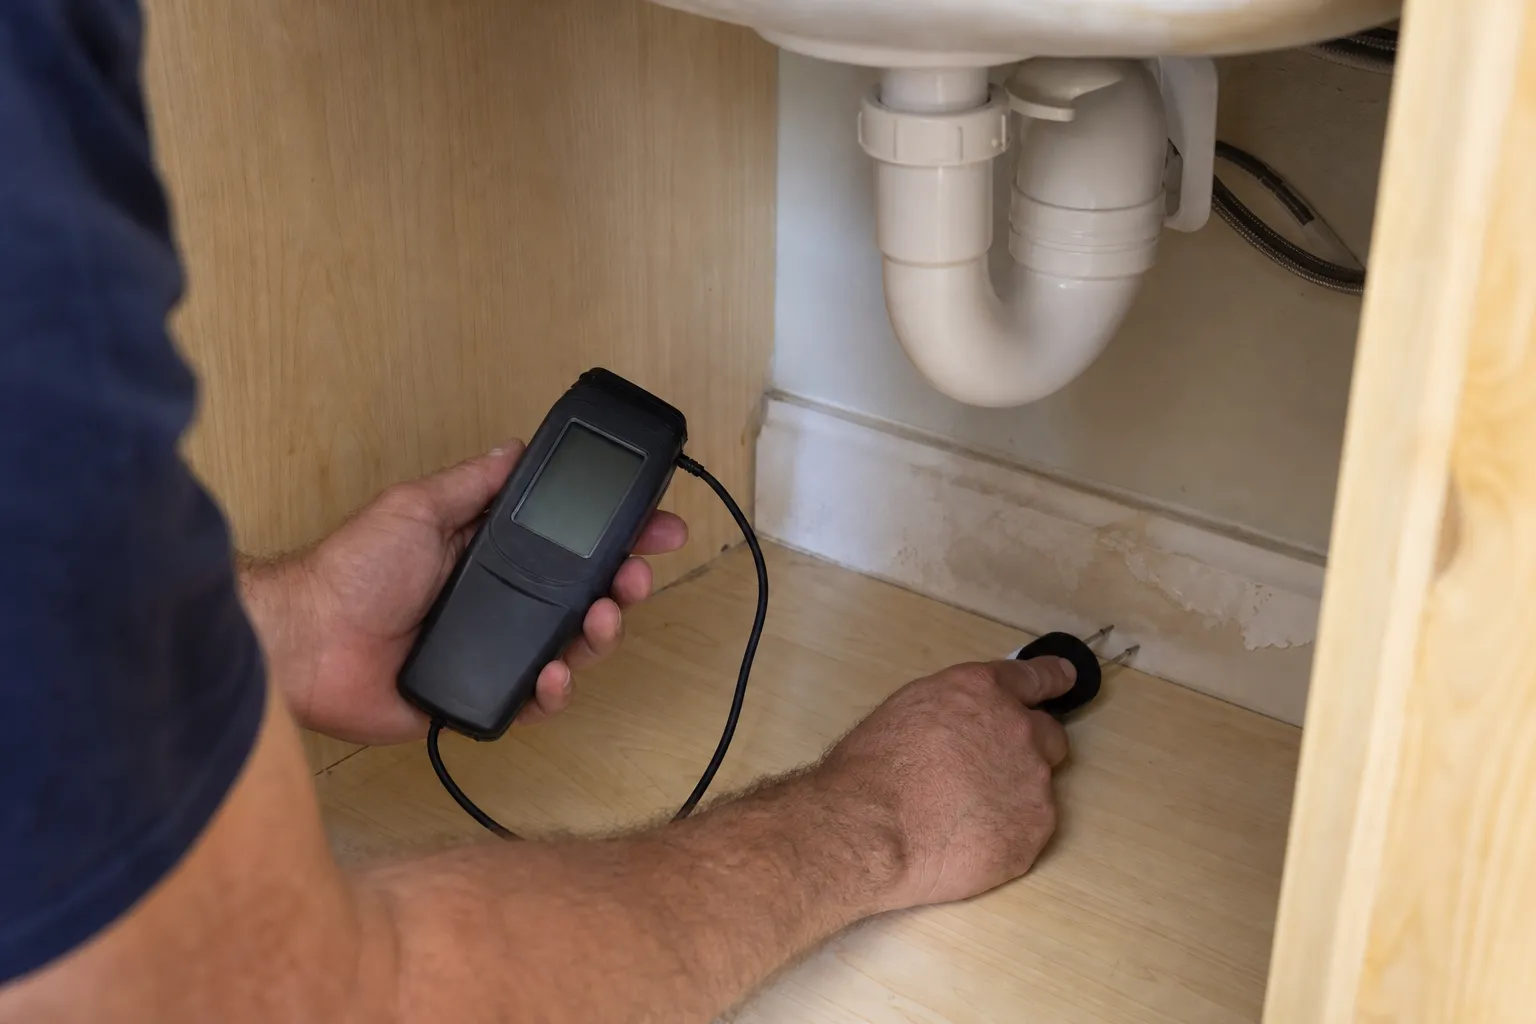
A leaking sink trap is one of the most common calls we get, and also one of the easiest to fix once you know what's actually causing it. Most of the time the culprit is something small, a loose slip nut, a worn washer, a hairline crack, not a sign that the whole drain system is failing.
The tricky part is that water under a sink spreads in ways that make the source hard to pin down. A puddle at the back of the cabinet might come from the trap itself, or it might be dripping down from a connection higher up and just landing there.
Homeowners in Santa Maria call us about this constantly. The same holds in Paso Robles and across the rest of the county, where the pattern is almost always the same handful of causes repeating in very different homes.
This guide walks through why traps leak, how to figure out where yours is actually leaking from, and what a repair or replacement actually involves.
A sink installation and repair visit usually resolves this in under an hour once the leak point is confirmed.
In this article, you will learn about:
- Why sink traps leak in the first place
- Diagnosing where the leak is actually coming from
- Fixing a leaking sink trap
- Preventing future leaks and knowing when to call a plumber
Keep reading to stop guessing and actually find out what's wrong under your sink.
Why sink traps leak in the first place
A sink trap is the curved section of pipe under every sink, shaped like a U or an S depending on the age of the plumbing. It holds a small amount of standing water that blocks sewer gas from coming back up through the drain.
That constant contact with water, combined with the trap being made of relatively thin material compared to the rest of the drain line, makes it one of the more failure-prone parts of a home's plumbing.
A trap sits downstream of nearly every fixture that drains into it, including the sink itself, a garbage disposal if there is one, and sometimes a dishwasher discharge line as well.
The P-trap's job and why it's a common weak point
The P-trap gets its name from its shape, a P-like curve that holds a water seal between the sink and the rest of the drain system. Without that seal, odors from the sewer line would drift straight up into the kitchen or bathroom.
Because the trap sits at a low point and holds water constantly, any weakness in its material or its connections shows up as a leak sooner than it would elsewhere in the drain line. It's also one of the few sections of pipe that's typically assembled with removable slip-nut joints rather than permanently glued fittings, which makes it both easy to service and easy to loosen by accident.
Older homes sometimes still have metal traps instead of PVC, and those carry their own failure pattern. A metal trap that's corroding from the inside eventually develops a pinhole leak long before it looks visibly damaged from the outside, the same slow failure pattern that shows up in older galvanized supply lines elsewhere in a house.
This is part of why a routine plumbing inspection often catches a trap problem before it ever turns into an actual leak on the cabinet floor.
Loose or worn slip-nut connections
The two slip nuts that hold a trap in place, one connecting to the sink tailpiece and one to the drain stub-out, are the single most common source of trap leaks. They rely on a rubber or nylon washer compressing against the pipe to form a seal, and that seal weakens with time, vibration, and repeated under-sink activity.
A few specific situations tend to loosen these connections:
- Someone bumping the pipe while reaching for something stored under the sink
- A garbage disposal installation that wasn't fully supported afterward
- Normal thermal expansion and contraction from hot water use over years
- A washer that was never fully seated correctly during the original installation
None of these require a full trap replacement to fix. In most cases, hand-tightening the nut, or replacing a cracked washer, solves the leak completely.
Homeowners in older sections of Morro Bay tend to see loose connections more often. The same is true across Atascadero and other older neighborhoods, simply because the original installs are decades old, not because the fittings themselves were lower quality.
Before calling a plumber for this one, it's worth checking that both slip nuts are actually hand-tight. A surprising number of trap leaks turn out to be exactly this simple.
A trap connected to a recently installed garbage disposal is especially worth double-checking, since the added weight and vibration of the unit puts extra strain on a joint that wasn't designed to support it.
The same goes for a trap near a low-flow fixture retrofit, where a slightly different tailpiece size can leave a connection less secure than the original setup.
Cracks, corrosion, and age
A crack in the trap itself is a different problem than a loose connection, and it generally means the part needs to be replaced rather than tightened. PVC traps can crack from over-tightening a slip nut, from impact, or simply from age and UV exposure if the cabinet door is left open under direct sunlight for long periods.
Metal traps fail differently. Hard water that's tough on a water heater's tank is just as tough on metal trap fittings over time, gradually thinning the walls of the pipe from the inside until a pinhole leak forms.
Chemical drain cleaners make both problems worse. Pouring a chemical cleaner down a slow drain generates heat that can soften PVC and accelerate corrosion in metal traps, which is part of why we don't recommend them even for a stubborn clog.
Hydro jetting clears the same buildup safely with high-pressure water instead, without the heat or chemical exposure that damages the trap over repeated use.
Diagnosing where the leak is actually coming from
Before anyone can fix a trap leak, the leak has to actually be confirmed as coming from the trap and not somewhere else under the sink. Skipping this step is the most common reason a repair doesn't actually solve the problem.
A few minutes of careful observation usually settles the question without needing to remove anything.
Finding the exact leak point under the sink
Start by drying everything under the sink completely with a towel, including the trap, the slip nuts, the supply lines, and the cabinet floor. A dry starting point makes it obvious where new moisture appears first.
Run water at a normal flow for about a minute and watch closely rather than walking away. Drips at a slip nut usually appear within seconds, while a hairline crack in the trap body itself might take a little longer to show a visible bead of water.
If nothing shows up during normal flow, try running the garbage disposal, if the sink has one, since some leaks only appear under the vibration and pressure of disposal use. The same goes for running hot water specifically, since thermal expansion can reveal a leak that's invisible with cold water alone.
A moisture meter or even a folded paper towel left overnight under suspect fittings can confirm a slow drip that's too small to see during a short test. This matters most in a bathroom sink cabinet, where the leak often goes unnoticed far longer than in an open kitchen space.
Telling a trap leak apart from other under-sink leaks
Several other things can leak in the same general area and get blamed on the trap by mistake. A leaking faucet supply line drips down the back of the cabinet wall and can land right next to the trap, making it look like the trap is the source.
A garbage disposal leaking at its base is another common mimic, since disposal units sit directly above the trap in most kitchen setups. Water running down the outside of the disposal housing often pools in the exact same spot a trap leak would.
A few distinguishing checks help sort out which part is actually responsible:
- Trace any wet pipe surface up toward its source rather than assuming the lowest point is the leak
- Check whether the leak appears only when water runs, or constantly, which can point toward a supply line instead of a drain
- Look specifically at the slip nuts and the trap's curved body for visible moisture or drips
- Rule out condensation on a cold supply line in humid weather before assuming any leak at all
Getting this diagnosis right the first time avoids paying for a trap repair that doesn't actually stop the leak because the real source was a different fitting entirely.
A shower or tub drain nearby can also contribute to a damp cabinet in a shared wall bathroom, so it's worth ruling out before assuming the sink itself is to blame.
When a clog is actually the root cause
Sometimes a trap that's never leaked before suddenly starts leaking after a clog develops further down the line. Standing water backed up in the trap puts sustained pressure on old slip nuts and washers that were barely holding before.
A kitchen sink that's backing up can be the actual trigger behind a leak that only shows up once the water level rises. Clearing the clog sometimes resolves the leak on its own, and other times it simply reveals a connection that needed attention anyway.
If slow drainage is a recurring pattern rather than a one-time event, a drain cleaning visit addresses the underlying cause instead of just the symptom that happened to show up at the trap.
Fixing a leaking sink trap
Once the leak is confirmed and the cause is clear, the actual fix is usually quick. What it involves depends mostly on whether the problem is a loose connection or a damaged part.
The sections below cover both the simple version and the point where it's worth bringing in a professional instead.
Simple fixes you can try yourself
For a loose slip nut, turning off the water supply, placing a bucket underneath, and hand-tightening the nut a quarter turn at a time often stops the leak immediately. Over-tightening with a wrench can crack the nut or distort the washer, so hand-tight plus a small amount extra is usually enough.
If tightening doesn't help, the washer itself may be worn, cracked, or simply missing a piece. Replacement washers are inexpensive and widely available, and swapping one out takes only a few minutes once the trap is disconnected.
This is the same kind of basic troubleshooting worth trying before calling about a running toilet too, since both problems often come down to one small worn part rather than anything structural.
A short sequence covers most do-it-yourself trap repairs:
- 1Shut off the water supply and place a bucket under the trap
- 2Loosen both slip nuts by hand and remove the trap section
- 3Inspect the washers for cracking, flattening, or debris
- 4Replace any worn washers and reassemble the connections
- 5Turn the water back on slowly and check for drips before walking away
If a crack in the trap body itself is the problem, a simple fix like this won't hold for long, even temporarily.
The same general approach applies to a bathtub drain trap, which uses a similar slip-nut design even though it's typically hidden behind an access panel rather than sitting in an open cabinet.
When a full trap replacement makes more sense
A cracked trap, a corroded metal one, or a trap that's been patched more than once already is usually better replaced than repaired again, the same logic that applies to pipe repair and whole-home repiping once patching the same section stops being worthwhile. The part itself is inexpensive, and the labor involved is close to the same as a smaller repair, so there's rarely a cost reason to avoid full replacement once a trap is genuinely damaged.
This is also the point where a drain cleaning visit sometimes gets bundled in, especially if the trap's condition suggests the rest of the drain line could use a look while everything is already disassembled.
Homes with a history of slow drains elsewhere in the house may also benefit from a broader look, since a trap replacement is a convenient moment to ask about sewer camera inspection if backups have been a recurring issue.
Choosing the right trap material and size
Most modern replacements use PVC, which resists corrosion and costs less than metal, though some older homes still specify brass for aesthetic or code reasons in a finished basement or visible installation. Either material does the job when it's sized correctly for the drain it's connecting.
Getting the diameter wrong is a surprisingly common installation mistake, especially when a disposal or a different sink style was added after the original trap was installed. A trap that's undersized for its drain line clogs more easily and puts uneven stress on its connections.
A few factors determine which size and material actually fit a given sink:
- The diameter of the existing drain stub-out in the wall or floor
- Whether a garbage disposal is attached and needs extra clearance
- Local code requirements for the fixture type and room
- Whether the trap is visible, which sometimes favors chrome or brass over plain PVC
Getting these details right the first time avoids a second visit, which is part of why this step is worth leaving to someone who handles these fittings regularly rather than guessing from a hardware store aisle.
Preventing future leaks and knowing when to call a plumber
A trap that's properly installed and occasionally checked rarely causes trouble for years at a stretch. A handful of simple habits keep it that way.
The sections below cover what to do on your own and when it's time to stop troubleshooting and make a call instead.
Habits that keep a trap sealed longer
Checking under the sink every few months, even just a quick glance with a flashlight, catches a slow leak long before it causes real damage. This matters more in cabinets that also store cleaning supplies or trash, since a slow drip can go unnoticed there far longer than in an open space.
A single dripping faucet above the trap wastes far more water than most people assume. The U.S. Environmental Protection Agency notes that a faucet leaking at just one drip per second wastes more than 3,000 gallons of water a year, water that often ends up pooling right where a trap connection sits.
Avoiding chemical drain cleaners, using the garbage disposal within its intended limits, and not storing heavy items that could bump the trap are small habits that add years to a connection's working life.
Hard water deposits build up inside fittings faster in some parts of the county than others, and a water treatment or filtration system can meaningfully slow that process for homes on well water or particularly mineral-heavy municipal supply.
Warning signs it's time to call a professional
A leak that keeps returning after tightening or a washer replacement usually means something beyond the trap itself is involved, whether that's a misaligned drain stub-out, a cracked tailpiece, or a clog further down the line. Repeating the same fix with the same result is a sign to stop and call someone.
A few other situations are worth skipping the do-it-yourself route entirely:
- Visible corrosion or a greenish stain on a metal trap
- A leak that shows up only when the disposal runs
- Water damage already visible on the cabinet floor or the wall behind it
- A trap that's been replaced more than once in the same spot within a year
A leak detection visit is worth considering too if the water damage under a sink doesn't line up with any visible leak at all, since the actual source could be a supply line leaking inside the wall rather than anything under the cabinet.
None of these situations are emergencies in the way a burst pipe is, but they're also not worth repeating the same fix a third time and hoping for a different result.
What a professional repair actually involves
A typical trap repair visit starts with confirming the diagnosis under the sink, which usually takes just a few minutes given the right tools. From there, a straightforward tightening or washer swap can happen on the spot.
For anything involving a full replacement, the technician will also check the condition of nearby fittings, including the faucet's supply lines and, where present, the disposal's mounting and discharge connection, since those are the parts most likely to be contributing to the same puddle. If the visit turns up a drain that's running slower than it should elsewhere in the house, that's usually mentioned as a separate, optional fix rather than bundled in automatically.
Drain Doctors Plumbing handles these repairs throughout San Luis Obispo County, including in:
A technician familiar with the area's older housing stock usually spots the likely cause before even opening the cabinet doors, just from knowing the neighborhood and the decade the home was built.
Most trap calls wrap up in a single visit either way, whether the fix turns out to be a quarter-turn on a slip nut or a full replacement with a new section of pipe.
Conclusion
A leaking sink trap feels like a bigger problem than it usually is, mostly because water under a cabinet is messy and hard to trace back to its actual source. In most cases, the fix is a tightened connection or a new washer, not a full plumbing overhaul.
Telling a loose nut apart from a cracked trap, and a trap leak apart from a disposal or supply line mimicking one, saves you from guessing twice before the problem actually gets solved.
If the leak under your sink keeps coming back, or you'd rather have someone confirm the diagnosis the first time, Drain Doctors Plumbing can take care of it in a single visit.
Tell us what's going on and our licensed team will point you in the right direction. Call (805) 467-1214 or request service online.